
9. Virtual tours
A tour is a set of 360° scenes connected with interactive points. Virtual tours (in the sidebar) lists all the tours of your business with their status: Draft, Processing, Published, Unpublished or Archived.
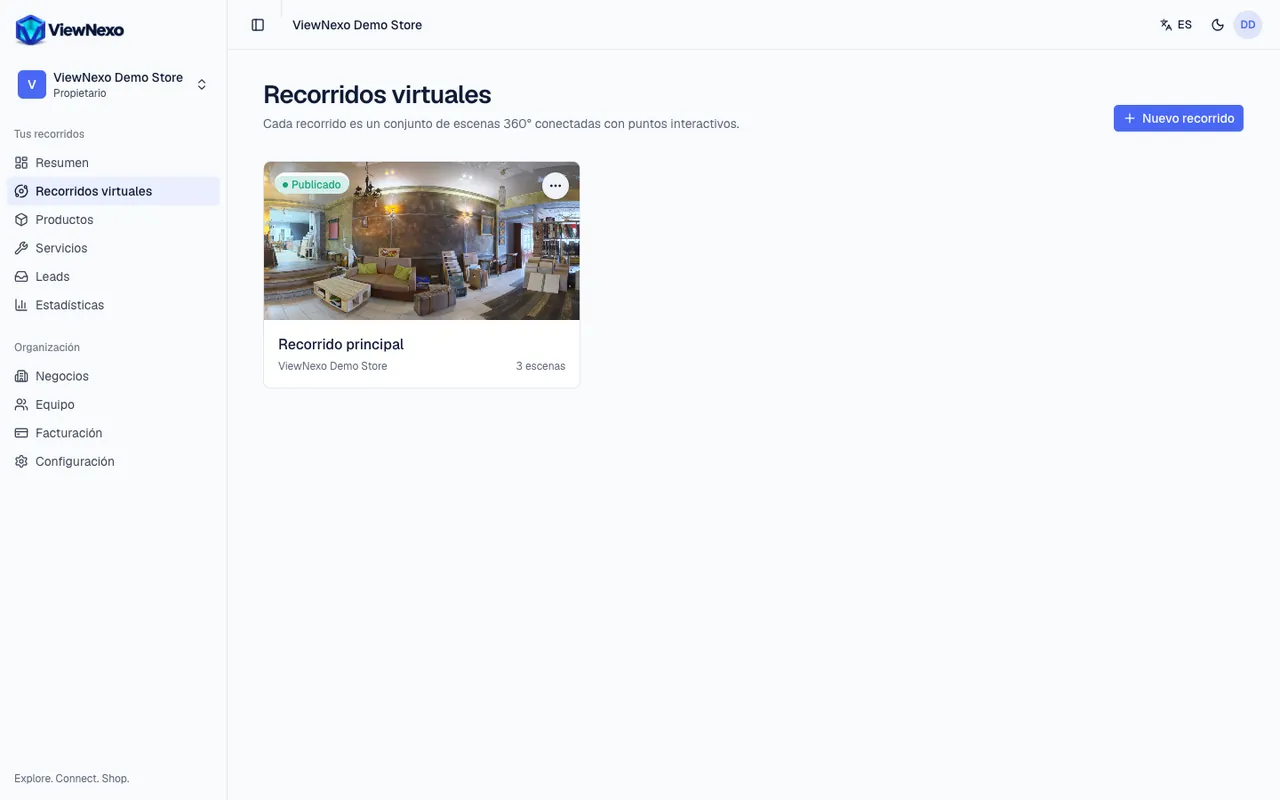
Creating a tour
- Press New tour, at the top right (it is also on the Overview).
- Enter the Tour name. The Link name fills in by itself; below it you see what the public link will look like.
- Choose the Location if you have several and add an optional Description. If you have several businesses, choose the Business first.
- Press Create tour. The tour's page opens.
Each tour in the list has an actions button with See how it looks, Open editor and Delete.
Uploading scenes from your computer
On the tour's page, the Scenes block has the Drop your 360° photos here box. There are two ways to upload:
- With the button: press Choose 360° photos. Your computer's file window opens. Go to the folder where your photos are (for example Downloads or Pictures), click a photo and press Open. To pick several, hold down the Ctrl key (⌘ on a Mac) while you click each one.
- By dragging: open your photos folder next to the browser, select them, drag them with the mouse onto the box and release the button when the box turns blue.
- Each photo uploads and is processed; when it finishes it appears as a scene with its picture. The one marked Start is the starting scene.
- Formats: equirectangular JPG, PNG, WebP or HEIC (iPhone) with a 2:1 ratio, from an Insta360, Ricoh Theta or a 360° app on your phone.
- Press a scene's picture to view it in 360°.
- If a scene fails, the bell lets you know: upload another picture or use Retry in the editor.
Tour settings
- Tour name, Link name and Description.
- Starting scene: the first one visitors see (if you do not choose, it is the First scene in order). And the Location.
- Visitor experience: Rotate slowly when idle, Show list of scenes, Show scene map and Show WhatsApp button.
- Search and social sharing: the Title and Description shown on Google and when the link is shared on WhatsApp or social networks.
- Press Save changes at the end of the block.
- At the bottom of the page is Delete tour: it deletes the tour, its scenes and points, and the link stops working. Products stay in your catalog.
Publishing, unpublishing and archiving
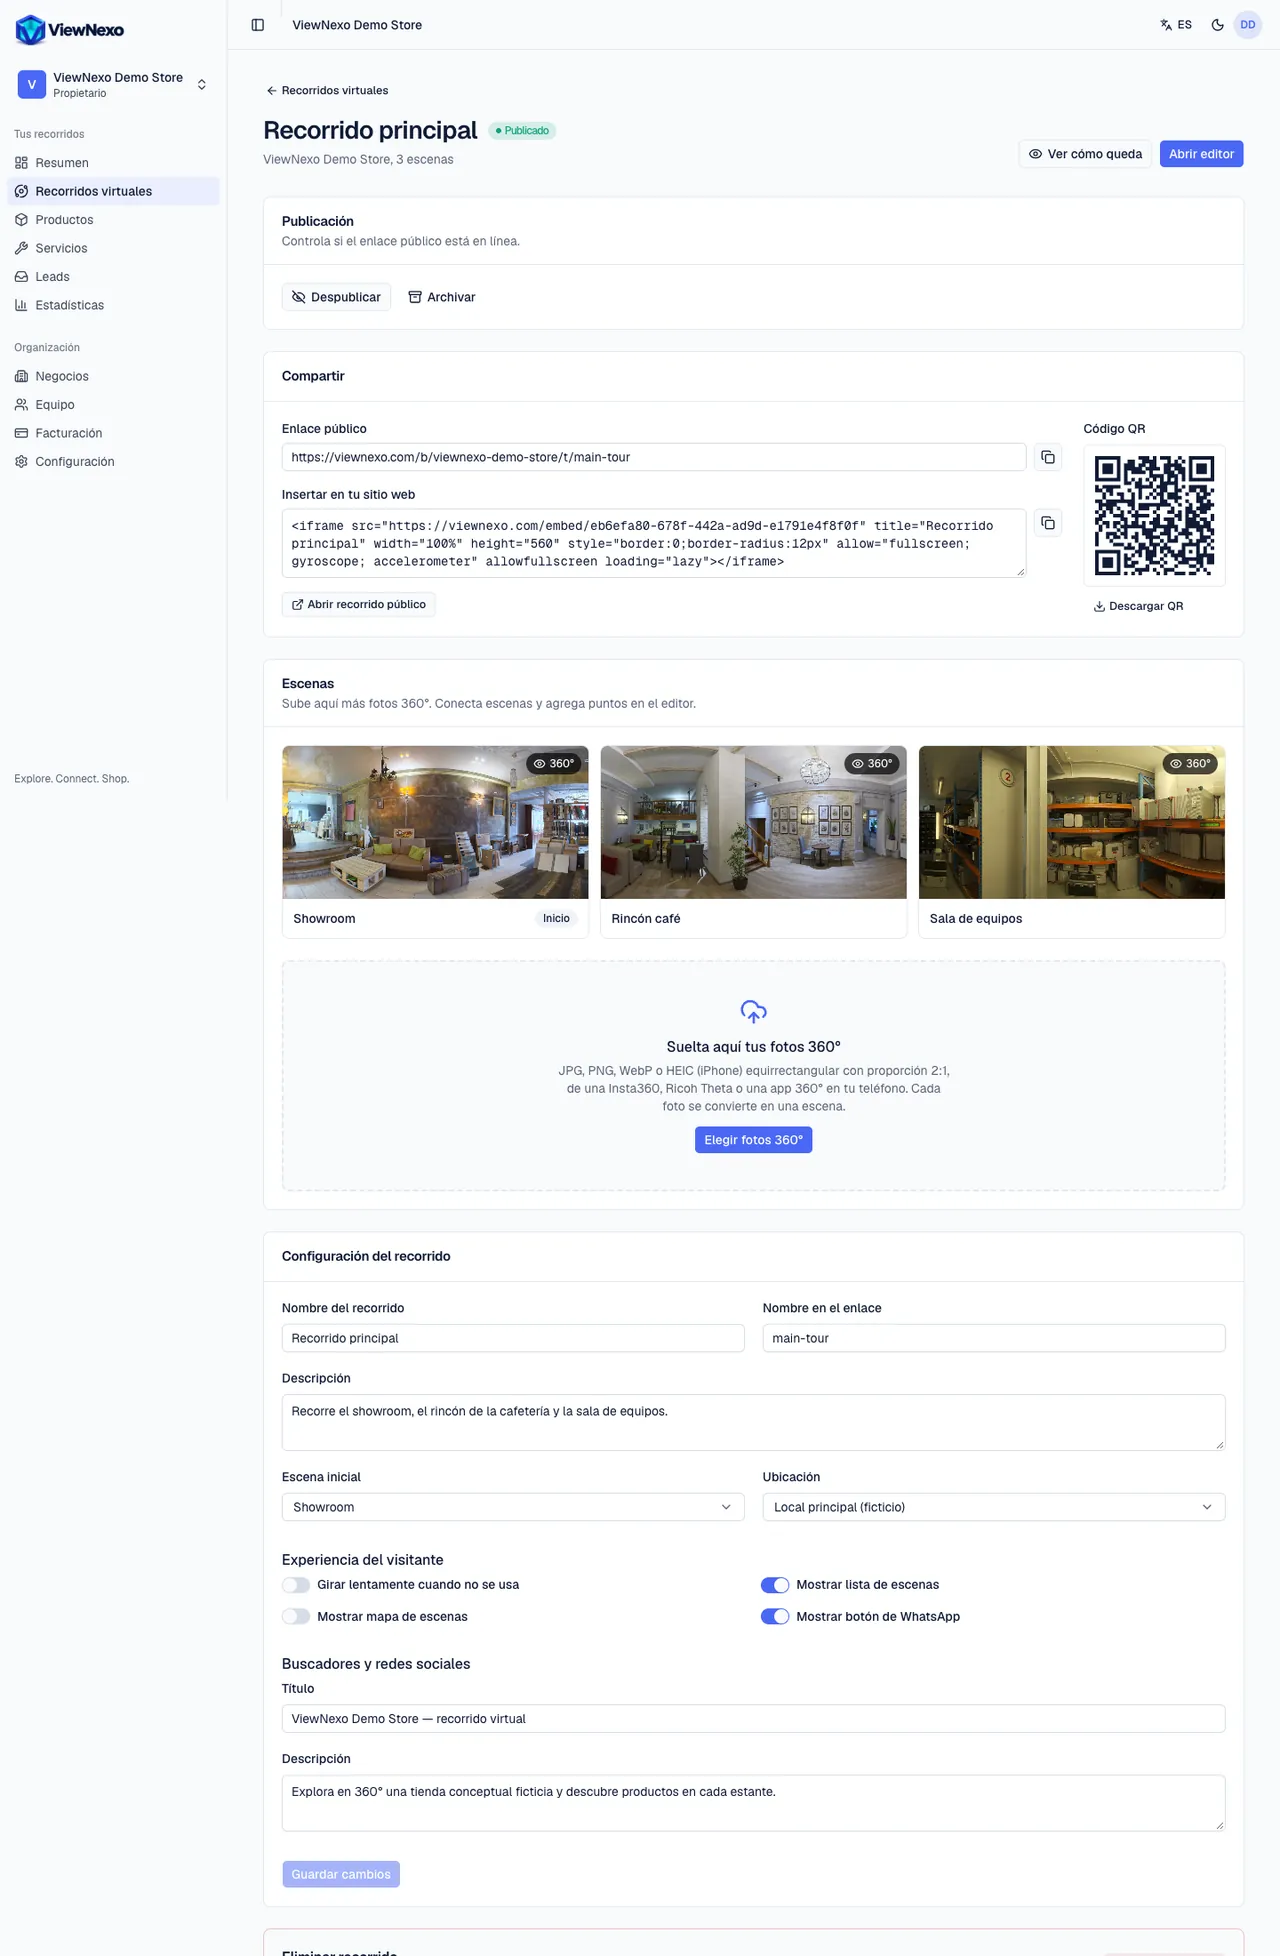
- At the top right: See how it looks (the tour as visitors will see it) and Open editor (to connect scenes and place points, chapters 10 and 11).
- In the Publishing block press Publish when it is ready. You need at least one processed 360° photo; if one is still processing, the tour goes live when it finishes.
- Unpublish takes it offline without deleting it: the link and embeds stop working until you publish again. It asks you to confirm.
- Archive takes it offline and out of your active tours. An archived tour is read-only: press Move to draft to edit or publish it again.
- Only managers and owners can publish.
The Share block
It appears once the tour is published. It has the Public link with a button to copy it (then paste it into WhatsApp, social networks or an email), the code to Embed on your website (an iframe; included in higher plans), the Open public tour button and the QR code with Download QR to print it. More ideas in chapter 24.