
8. 360° photos with the ViewNexo 360 app
Every scene of the tour is an equirectangular 360° photo with a 2:1 ratio (twice as wide as it is tall). The easiest way to get one is the ViewNexo 360 app, free on the App Store for iPhone (the Android version is on its way): it turns the phone camera into a 360° camera and drops the scene straight into your tour.
 Android · Coming soon
Installing the app on your iPhone
- Find the App Store icon on your iPhone: a blue square with a white A. Tap it.
- At the bottom right tap Search (the magnifying glass).
- Tap the search bar at the top, type ViewNexo 360 and tap Search on the keyboard.
- In the results find ViewNexo 360 and tap Get. (If you see a cloud with an arrow, you had it before: tap it.)
- Confirm with Face ID (many iPhones ask you to double-click the side button), Touch ID or your Apple ID password.
- Wait for the download to finish and tap Open. The icon stays on your home screen.
You can also tap the App Store button in this chapter, or the one in the App section of viewnexo.com, from your iPhone.
Signing in with your business account
- The first screen asks How do you want to use ViewNexo 360? Tap I have a business on ViewNexo.
- Enter the same Email and Password you use for the dashboard and tap Sign in.
- On Choose where to capture, select the Company, the Store (your business) and the Tour the scene belongs to, and tap Open tour.
- If you have no tour yet, create it first from the dashboard (chapter 6 or 9).
Only want personal 360° photos? Tap I just want to create 360° photos and create a free personal account. Those photos are private, saved to your library and can be deleted from the app.
Taking the 360° photo
- At the bottom tap Capture. On New 360° scene type the Scene name (for example Entrance, Checkout or Storage) and tap Capture 360°.
- The first time, the app asks to use the camera: tap Allow.
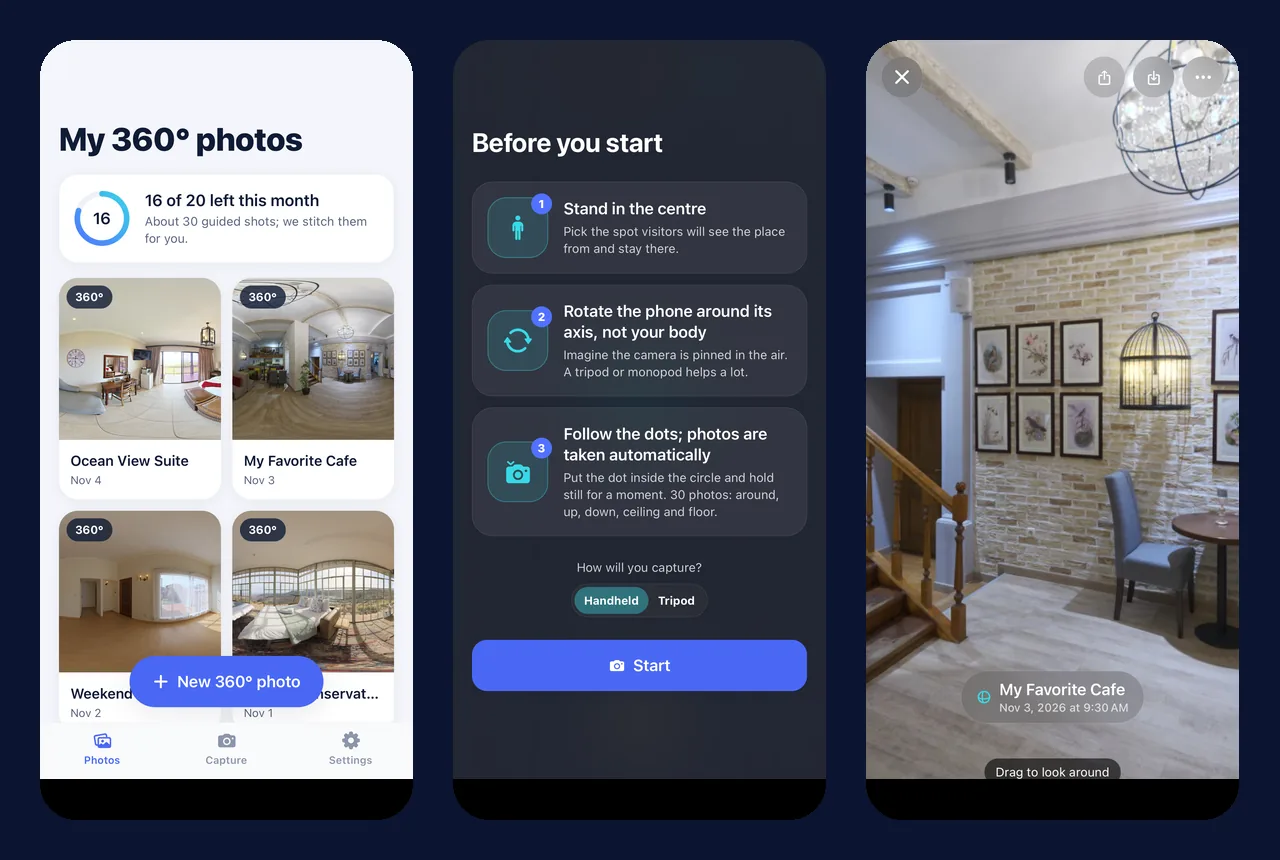
- Read the Before you start guide: stand in the centre of the space, rotate the phone around its own axis (not around your body) and follow the dots. Under How will you capture? choose Handheld or Tripod. A tripod or monopod improves the result a lot.
- Tap Start. Hold the phone upright and point straight ahead: the first photo sets the centre.
- A dot and a circle appear on screen. Move the phone slowly until the dot sits inside the circle and hold still for a moment (you will see Hold still!): the app shoots by itself.
- Follow the dots around you, then upwards, downwards, the ceiling and the floor. About 30 photos. If one went wrong, tap Undo; if you need to stop, Pause and then Resume.
- When you finish you will see Done! You have all the photos. Tap Review and upload and then Upload.
- The app uploads the photos and our servers stitch them into a single 360° image: Uploading photos, Stitching photos, Processing 360° and Ready!. It takes about a minute and you can leave the screen meanwhile: the scene appears in the tour on its own.
- Tap View in the tour to check it, or Capture another for the next area.
Check it in the app's viewer or in the dashboard editor. If a seam shows or someone moved, capture again from the same spot: the new photo replaces the old one with Replace photo in the editor (or in the scene's menu in the app).
Tips for good photos
- Turn on all the lights, avoid strong backlight (windows at midday) and tidy up: everything shows, including the ceiling and the floor. Ask people to step out of the frame for a minute; anyone who moves may come out cut.
- Height and spot: eye level, from where a customer would look at the space. One scene per area: entrance, aisles, counter, fitting rooms.
- Do not walk around during the capture: turn on the same spot. If the app says you walked away, go back to where you took the first photo.
- Go slowly. If the app says Slower, ease off.
Have a 360° camera or photos already?
- A 360° camera (Insta360, Ricoh Theta or similar) works too: export the finished photo as JPG, PNG, WebP or HEIC and upload it from the tour page or the editor (chapters 9 and 10).
- From the iPhone, in the app tap Upload from library or Upload from Files. The photo must have a 2:1 ratio and be at least 2000 pixels wide; panoramas from the iPhone's Pano mode do not work.
- Privacy: business-mode photos are published only when you publish the tour.
No need to re-shoot when prices or stock change: products live in your catalog, not in the photo.