
13. Products and categories
Products is your catalog: what you sell, with its photo, price and availability. You find it in the left sidebar, right below Virtual tours. Any change to a price, photo or availability shows up instantly in all your tours, without taking new photos.
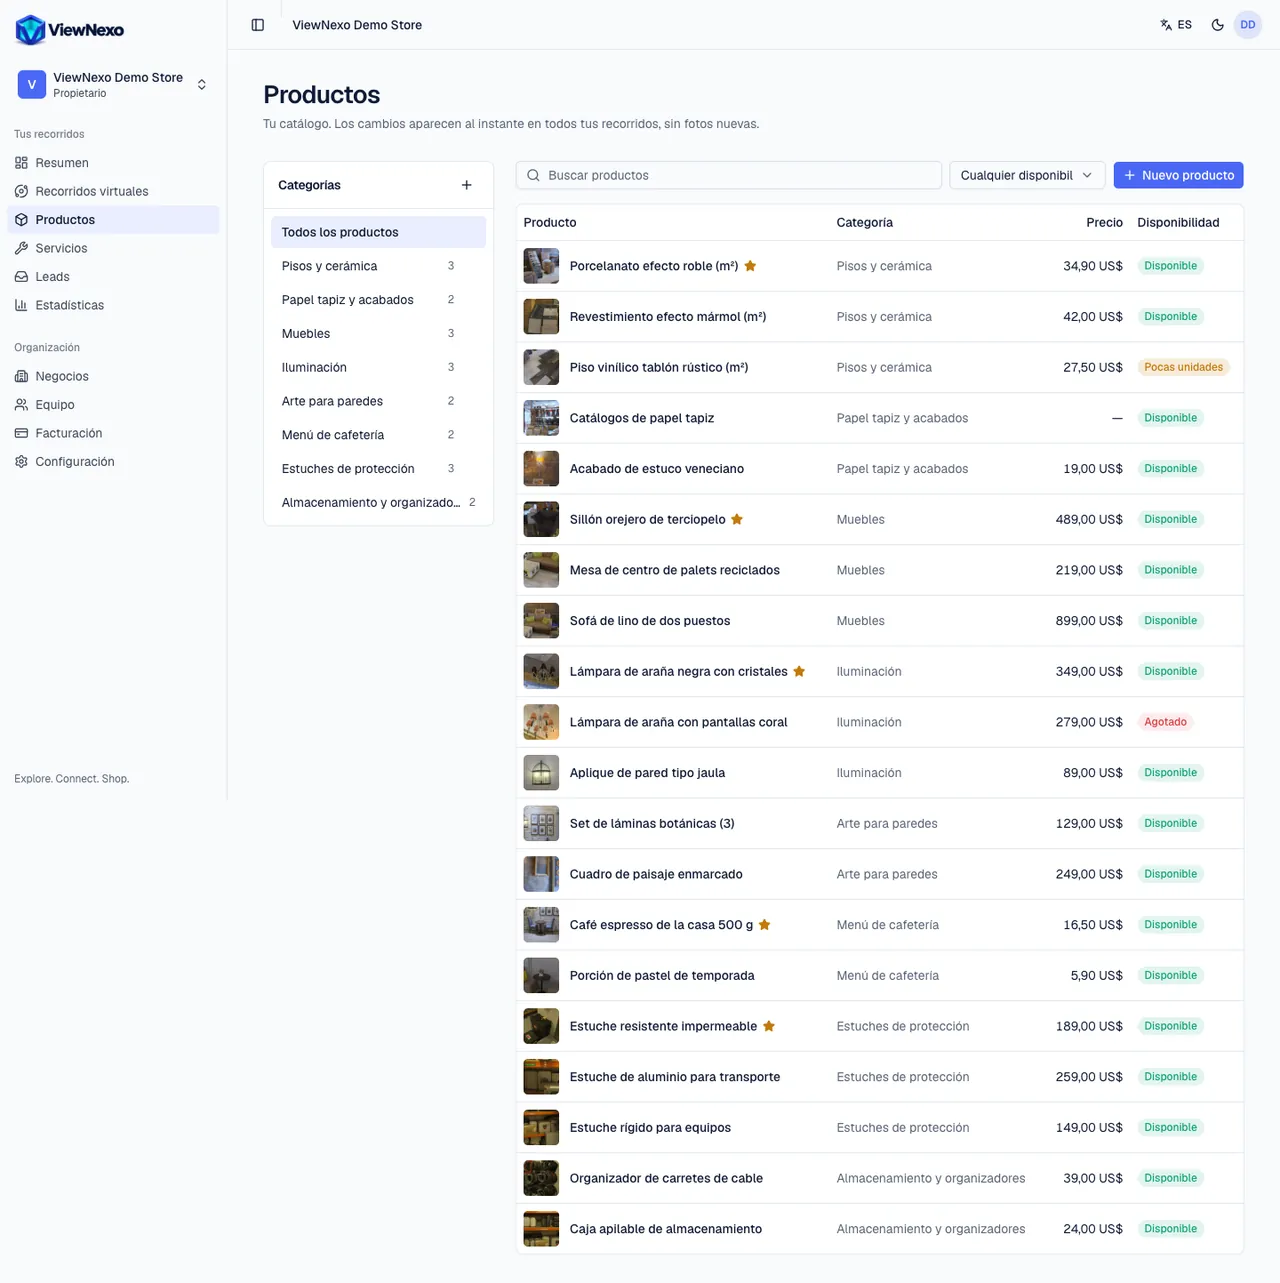
- Categories (left column): they group your products, for example Furniture or Lighting. Each category can be a smart shelf in the tour: it shows everything inside it on its own. Next to each category you see how many products it has.
- Search products: type part of the name. Any availability: filter by In stock, Low stock, Out of stock or Pre-order.
- The table shows product, category, price and availability. Featured products have a star; hidden ones say Hidden from visitors under the name. If you have many, the pages appear at the bottom.
- Import CSV and Export CSV, top right: to load or download your whole catalog at once with a spreadsheet (step by step below).
- If you have several businesses, each one has its own catalog: choose which one to see in the business selector at the top right of the page.
Create your first category
- In the left sidebar, click Products.
- In the Categories box, click the + sign to the right of the title (if you have none yet, you will also see the Add category button).
- In Name, type what it is called, for example Drinks, Shoes or Rooms.
- Inside category: leave it on Top level. Only pick another category if you want this one to be a subcategory (for example Sneakers inside Shoes).
- Description: optional, one line explaining what is inside.
- Click Create. The category appears in the list on the left.
- To rename or delete it, hover over it with the mouse (on a phone it is already visible) and click the three dots (⋯): Edit or Delete. When you delete it, its products stay in your catalog without a category, and the shelves that pointed to it stop showing products.
Add a product
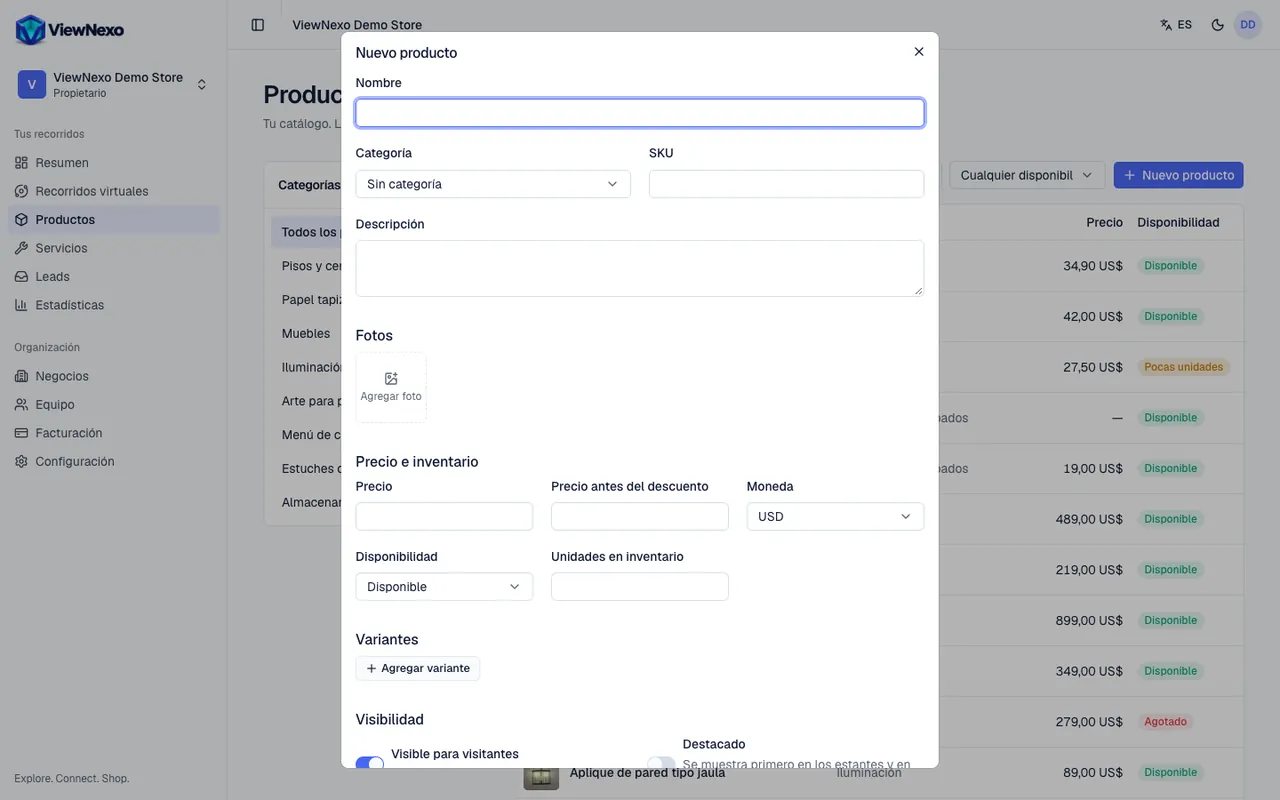
- Click the blue New product button, top right of the table. A window opens.
- Name: the name your customer will see, for example Ground coffee 500 g. It is the only required field.
- Category: pick one from the list. If you don't, it stays as No category.
- SKU: your internal product code, if you use one (for example COF-500). It is optional, but it helps when updating prices from Excel.
- Description: say what it is, what it is made of, sizes or measurements. If your plan includes the assistant, the Write with AI button next to the field title suggests a text (chapter 17).
- Photos: click the Add photo box. On a computer the window to choose files opens: find the photo (usually in Downloads, Pictures or Desktop), select it and click Open. On a phone you can pick from your gallery or take a photo right then.
- You can upload up to 8 photos per product, in JPG, PNG, WebP or HEIC (iPhone photos), up to 10 MB each. You can choose several at once.
- The first photo is the cover: it carries the Cover label and is the one shown on the shelves. To change it, remove the photos with the X in their corner and upload them again starting with the one you want as the cover.
- Price: just the number, without the $ sign (for example 12.50). Price before discount: optional; if you fill it in, visitors see it crossed out next to the new price.
- Currency: USD comes selected; change it if you sell in another currency.
- Availability: In stock, Low stock, Out of stock or Pre-order. Units in stock: optional; if you fill it in and sales are on, every order deducts units automatically.
- Variants: click Add variant for each size, color or presentation (for example 128 GB / Black), with its own price and SKU if they change. The trash icon removes a variant.
- Visibility: Visible to visitors comes on; turn it off if the product is not ready yet (it stays as a draft). Featured makes it appear first on the shelves and on your page.
- Buy online link: optional. Paste the address of your online store or of the product on a marketplace.
- Click Add product, bottom right. You will see the Product added message and the product in the table.
Then, in the 360° editor, place the product in the scene where it is with a Product point, or place a smart shelf with its category (chapter 11).
Change a price or mark a product out of stock
- In Products, tap the product name in the table. The Edit product window opens.
- Change the number in Price, or under Availability pick Out of stock.
- Click Save changes. The change shows instantly in all your tours; visitors just need to reload the page.
- To delete a product, open it and click Delete, bottom left. It disappears from every tour and shelf, so if you only want to hide it for a while, turn off Visible to visitors instead.
Import your catalog from Excel
If you have many products, you don't need to create them one by one: you can fill them in a spreadsheet (Excel or Google Sheets) and upload them together. The file you upload is a CSV, which is a spreadsheet saved as plain text.
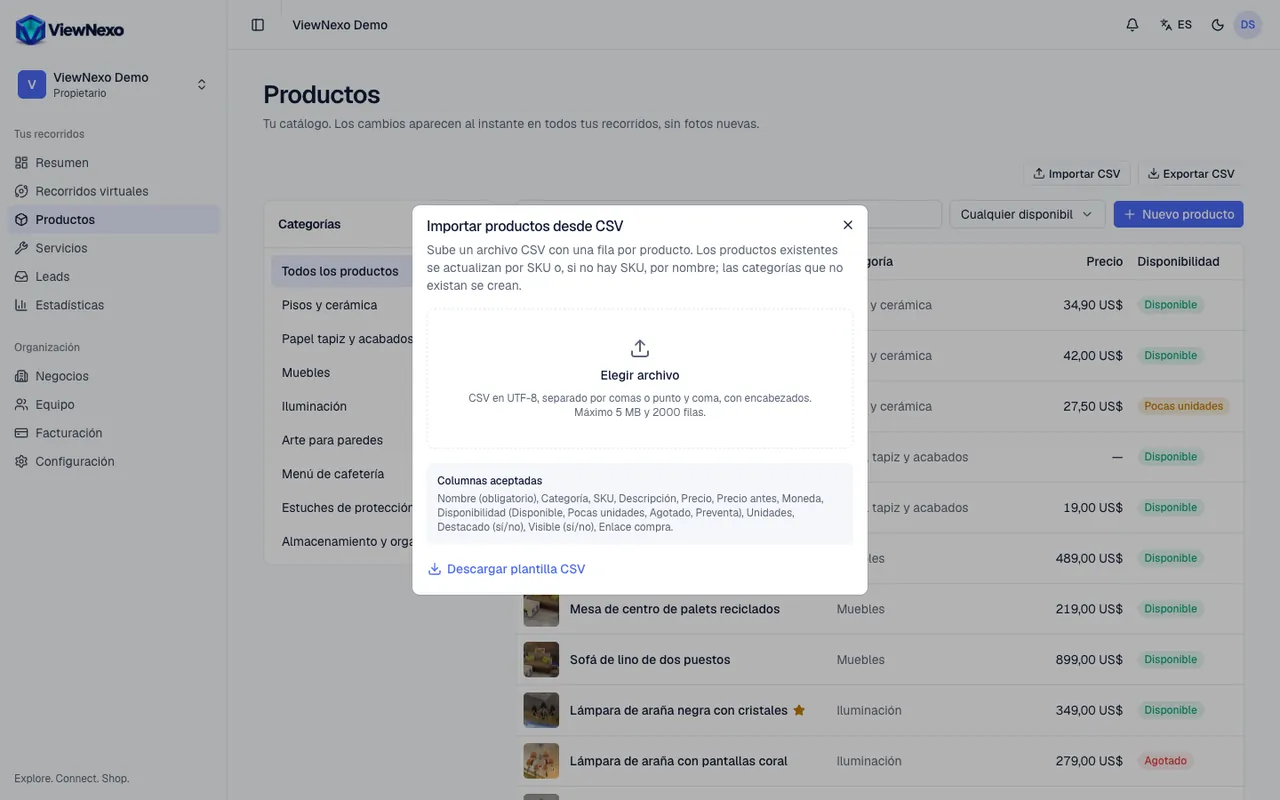
- In Products, click Import CSV, top right. The Import products from CSV window opens.
- Click Download CSV template, at the bottom of the window. The products-template.csv file is downloaded, usually to your Downloads folder.
- Open it. On a computer, double-click it and it opens in Excel. If you use Google Sheets: go to sheets.google.com, click File → Import → Upload and choose the template.
- The first row has the column titles: don't change it. The second row is an example (Runner shoe size 42): type your first product over it or delete it.
- Write one product per row, starting on row 2. One cell per piece of information, with no empty rows in between.
- name: required. Example: Ground coffee 500 g.
- category: the category name, for example Café. If it doesn't exist, it is created automatically.
- sku: your code, for example COF-500. Optional, but recommended.
- description: the product text.
- price and compare_at_price: numbers only, for example 8.50 (without the $ sign). compare_at_price is the crossed-out price; leave it empty if there is no discount.
- currency: USD or another three-letter currency.
- availability: in_stock, low_stock, sold_out or preorder.
- stock: how many you have, for example 12. You can leave it empty.
- featured and visible: yes or no.
- purchase_url: the address of your online store, if you have one. image_url: photos are not loaded through this file; add them afterwards from each product.
- Save the file as CSV. In Excel: File → Save As → in the file type pick CSV UTF-8 (Comma delimited) → Save; if Excel asks whether to keep that format, say yes. In Google Sheets: File → Download → Comma-separated values (.csv).
- Back in the dashboard, click Import CSV and then Choose file. Find your file (usually in Downloads) and open it. It must be under 5 MB and have at most 2000 rows.
- Click Review. Nothing is saved yet: you see the Preview with how many Rows it read, how many products Will be created, Will be updated and Will be skipped.
- If there are Rows with errors, each one says the row number and what is wrong. Fix those rows in your sheet, save again and click Choose another file.
- When everything looks right, click the Import button (it says how many products). When it finishes you will see Done with the summary. Click Close.
- Products that already exist are updated: they are matched by SKU or, if they have no SKU, by name. That is why you can repeat the import every time your prices change.
- Your plan's product limit is respected (you see it under Billing).
- Export CSV, top right in Products, downloads your whole catalog (you will see Catalog downloaded) to your Downloads folder, with the same columns as the template. Use it to change prices in Excel and import it again, for your accounting, or as a backup.