
11. Interactive points
Points are what visitors tap inside the panorama. Press Add (the blue button above the panorama), choose the type and click on the panorama where you want the point, or press Place at view centre. New point appears on the right for its details; press Create.
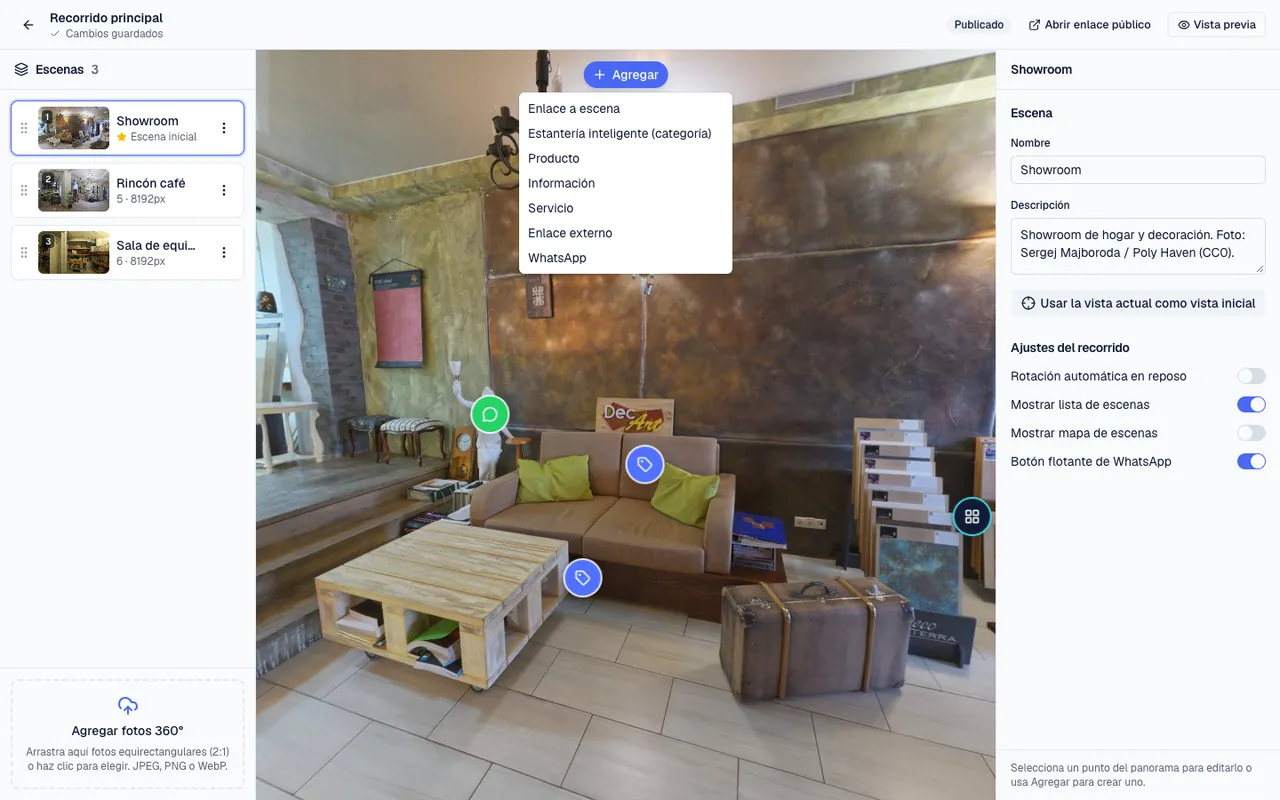
- Link to scene: the arrow to move to another scene. Under Goes to you choose the destination; this is what turns loose photos into a tour. Example: at the entrance, an arrow towards the aisle. You need at least two scenes.
- Smart Shelf (category): shows every product of a catalog category with up-to-date price and stock. Example: over the tools shelf, the Tools category.
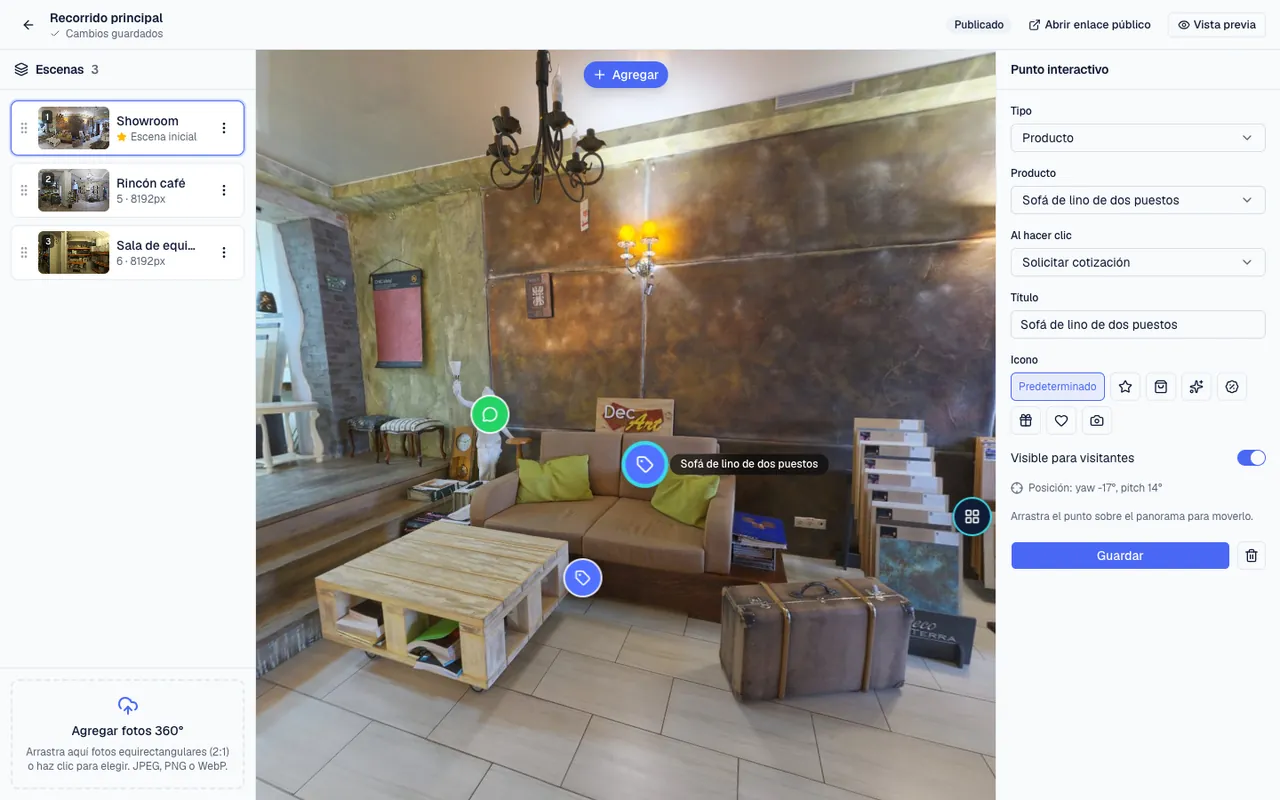
- Product: one specific product. Under When clicked you choose Show product, Open WhatsApp, Request information, Request a quote or Open external link. Example: over the sofa on display, that sofa with its price.
- Information: a text with a title, for example opening hours, today's menu or the story of the place.
- Service: shows a service and lets visitors Request a booking or Request information (also Open WhatsApp or a link). Example: in the massage room, the relaxing massage.
- External link: opens another page, such as your online shop or booking system. Type the full address in URL, starting with https://.
- WhatsApp: opens a chat with you. You can write your own WhatsApp message or leave it empty to use the business template. Example: next to the till, Message us.
For every point you can change the Title, pick the Icon (default, star, bag, sparkles, percent, gift, heart or camera), turn off Visible to visitors to hide it without deleting it and press Save. The bin button deletes the point.
To move a point, drag it on the panorama. To fine-tune, press the point and use the arrow keys (with Shift it moves further). Requests for information, quotes or bookings arrive in Leads (chapter 15).
If, when choosing a product, category or service, it says there are none yet, create them first under Products or Services (chapters 13 and 14).
Place at least one arrow there and one back between each pair of scenes so nobody gets stuck.
Your first arrow between two scenes
- Open the editor of a tour with at least two scenes, for example Entrance and Aisle.
- In the list on the left press Entrance.
- Turn the panorama until you see the door or the way to the aisle.
- Press Add and choose Link to scene. At the top you see Click on the panorama to place the point.
- Click on the floor, on the way to the aisle. The arrow appears and, on the right, the New point panel.
- Under Goes to choose Aisle. The Label fills in with the scene's name; change it if you like.
- Press Create. Then press Preview, at the top, and tap the arrow to check it takes you to the aisle; Back to editing brings you back.
- Now open Aisle and repeat the steps with an arrow that leads back to Entrance.
Your first product point
- First, create the product under Products (chapter 13), with its photo and price.
- In the editor, open the scene where the product can be seen and turn until it faces you.
- Press Add and choose Product. Click right on top of the product in the photo.
- In the panel on the right, under Product, press Choose… and pick it from the list.
- Under When clicked keep Show product (the card with photo and price), or choose Open WhatsApp or Request a quote.
- Check the Title, pick an Icon if you like (the bag suits products) and press Create.
- Press Preview and tap the point to see what your customer will see.